Zovido -SpreadSheet As A Database

SpreadSheet As A Database

Zovido is backed up by Google Spreadsheet. It uses SpreadSheet as if it was providing 'Backend As A Service'. So, we can say that Zovido is using spreadsheet as its database.

Instructions For Maintaining SpreadSheet

You can maintain spreadsheet as a database for Zovido in easy 4 steps. We have a step-by-step guide that will help you through the whole process.

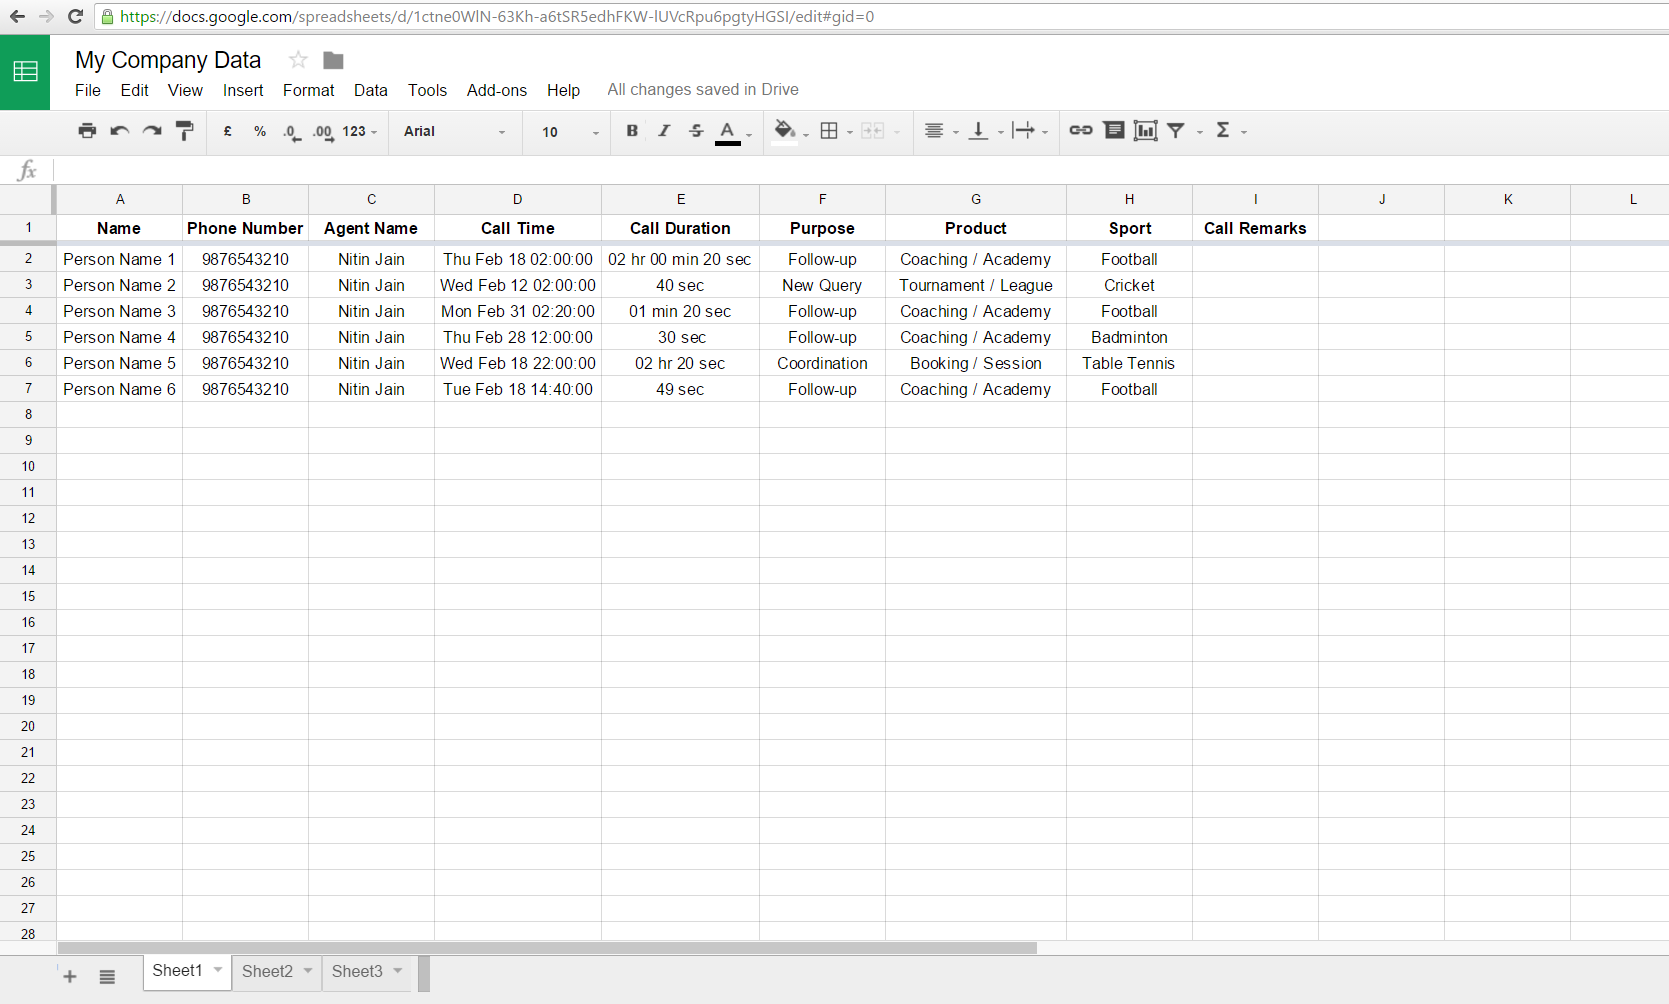
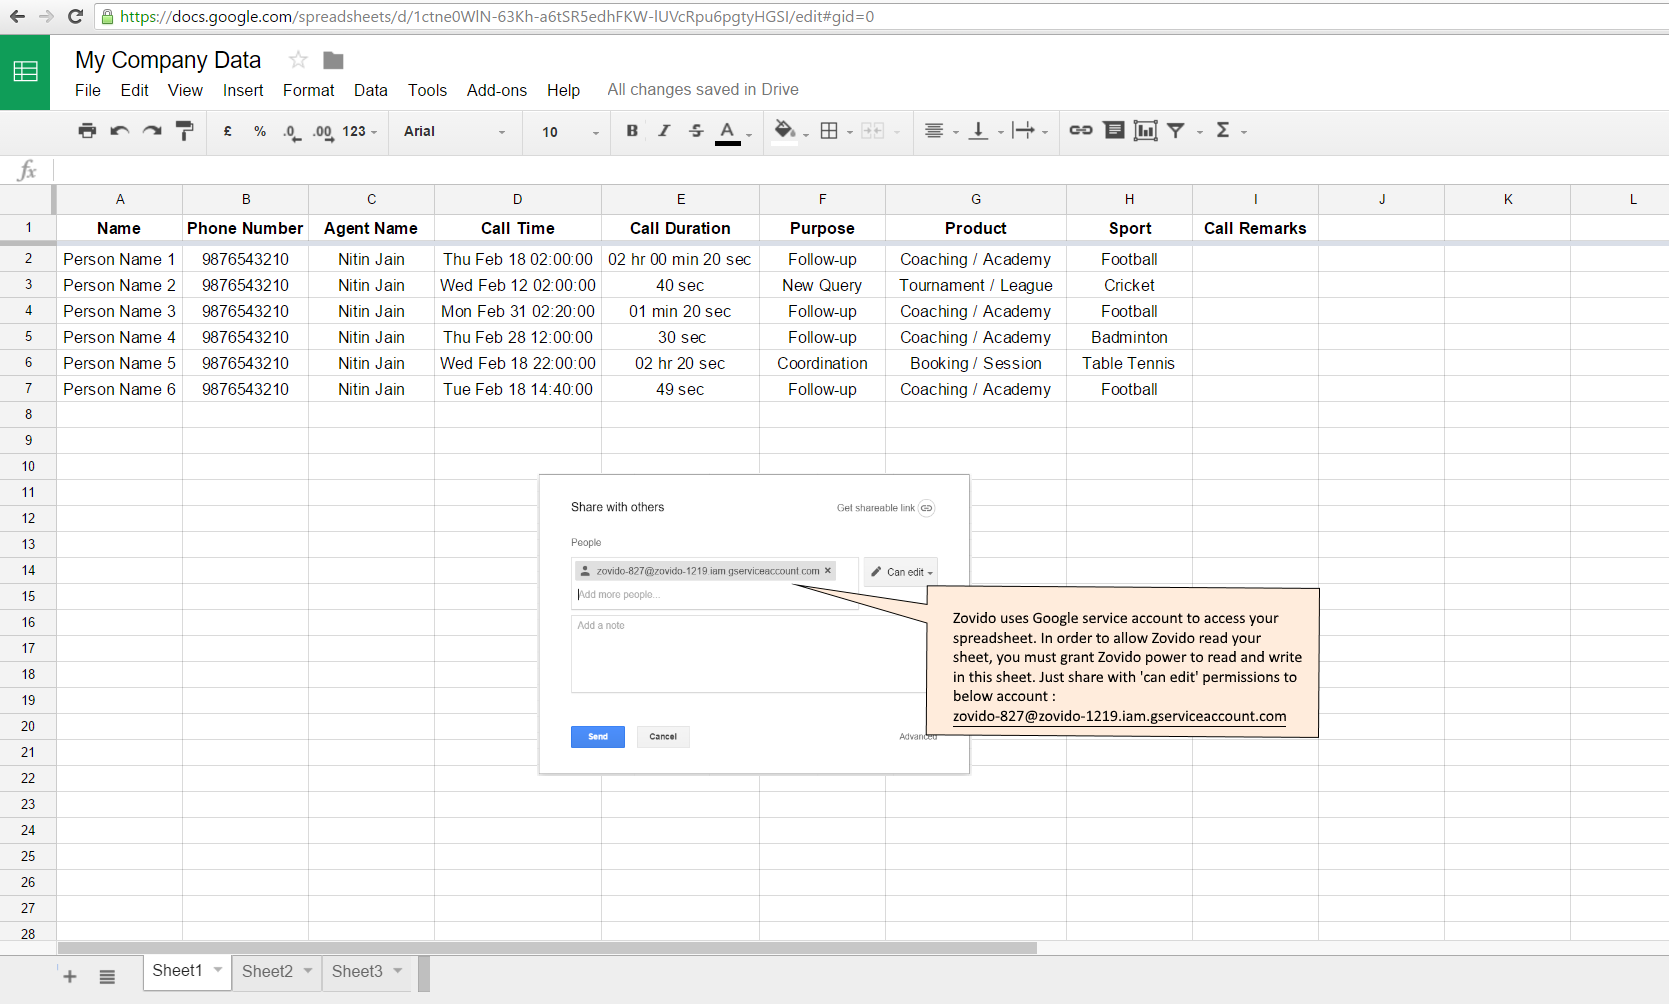
Before we dive in, lets look at how this database will look like. Below is the sample data stored in spreadsheet by Zovido app. For a quick reference, Zovido is an app that helps you save details for all types of interactions that you had with your customer (though data is best structured for phone call interactions), and these details can be then extracted locally to device storage or can be appended to a specified spreadsheet, the one like shown below :

Step 1 : The File Key

Each Google SpreadSheet has what they call - The File Key. This key is in the URL of your SpreadSheet. Zovido must know your file key before it can read and write to this SpreadSheet. Zovido comes with a default file key, but one can always change this key from its navigation drawer. Below Figure helps your locate your SpreadSheet key :

Step 2 : The Header Row

Zovido will treat your SpreadSheet as its database, from which it will read and write, so it is very important that Zovido is aware of its database schema. In order to be consistent, your SpreadSheet must have exactly same header row as shown below, with its header row freezed (Check out here to know how to freeze a row) :

IMPORTANT : THESE HEADER CELL NAMES CANNOT BE CHANGED IN ZOVIDO, SO THEY MUST NEVER CHANGE.

Step 3 : The Worksheet Name

Each SpreadSheet can have many worksheets, a worksheet can have any name you desire, but make sure that Zovido knows its database worksheet name. The worksheet name can be changed from Zovido's drawer.

Step 4 : Share With Zovido

Zovido needs read and write permissions from your SpreadSheet. Zovido uses OAuth2.0 to login to a Google Service Account, to whom 'can edit' permissions must be granted. In your opened SpreadSheet, just click on File Menu and then select Share, when 'Share with Others' dialog appears, add : zovido-827@zovido-1219.iam.gserviceaccount.com in people column. Remember to check that 'can edit' permission is granted, and finally click 'Done'.

Checklist

Important check list concluding all steps :

  • Zovido must know spreadsheet file key
  • Header row must be consistent with Zovido table schema
  • Zovido must know worksheet name
  • Spreadsheet must be shared with Zovido's service account


© Abhinav Puri 2016                                                                                                       Last Updated : 25-02-2016